Create Campaign
1. Advertising Campaign setup.
Create campaign name. Add Target Url. Choose Format of Advertisement
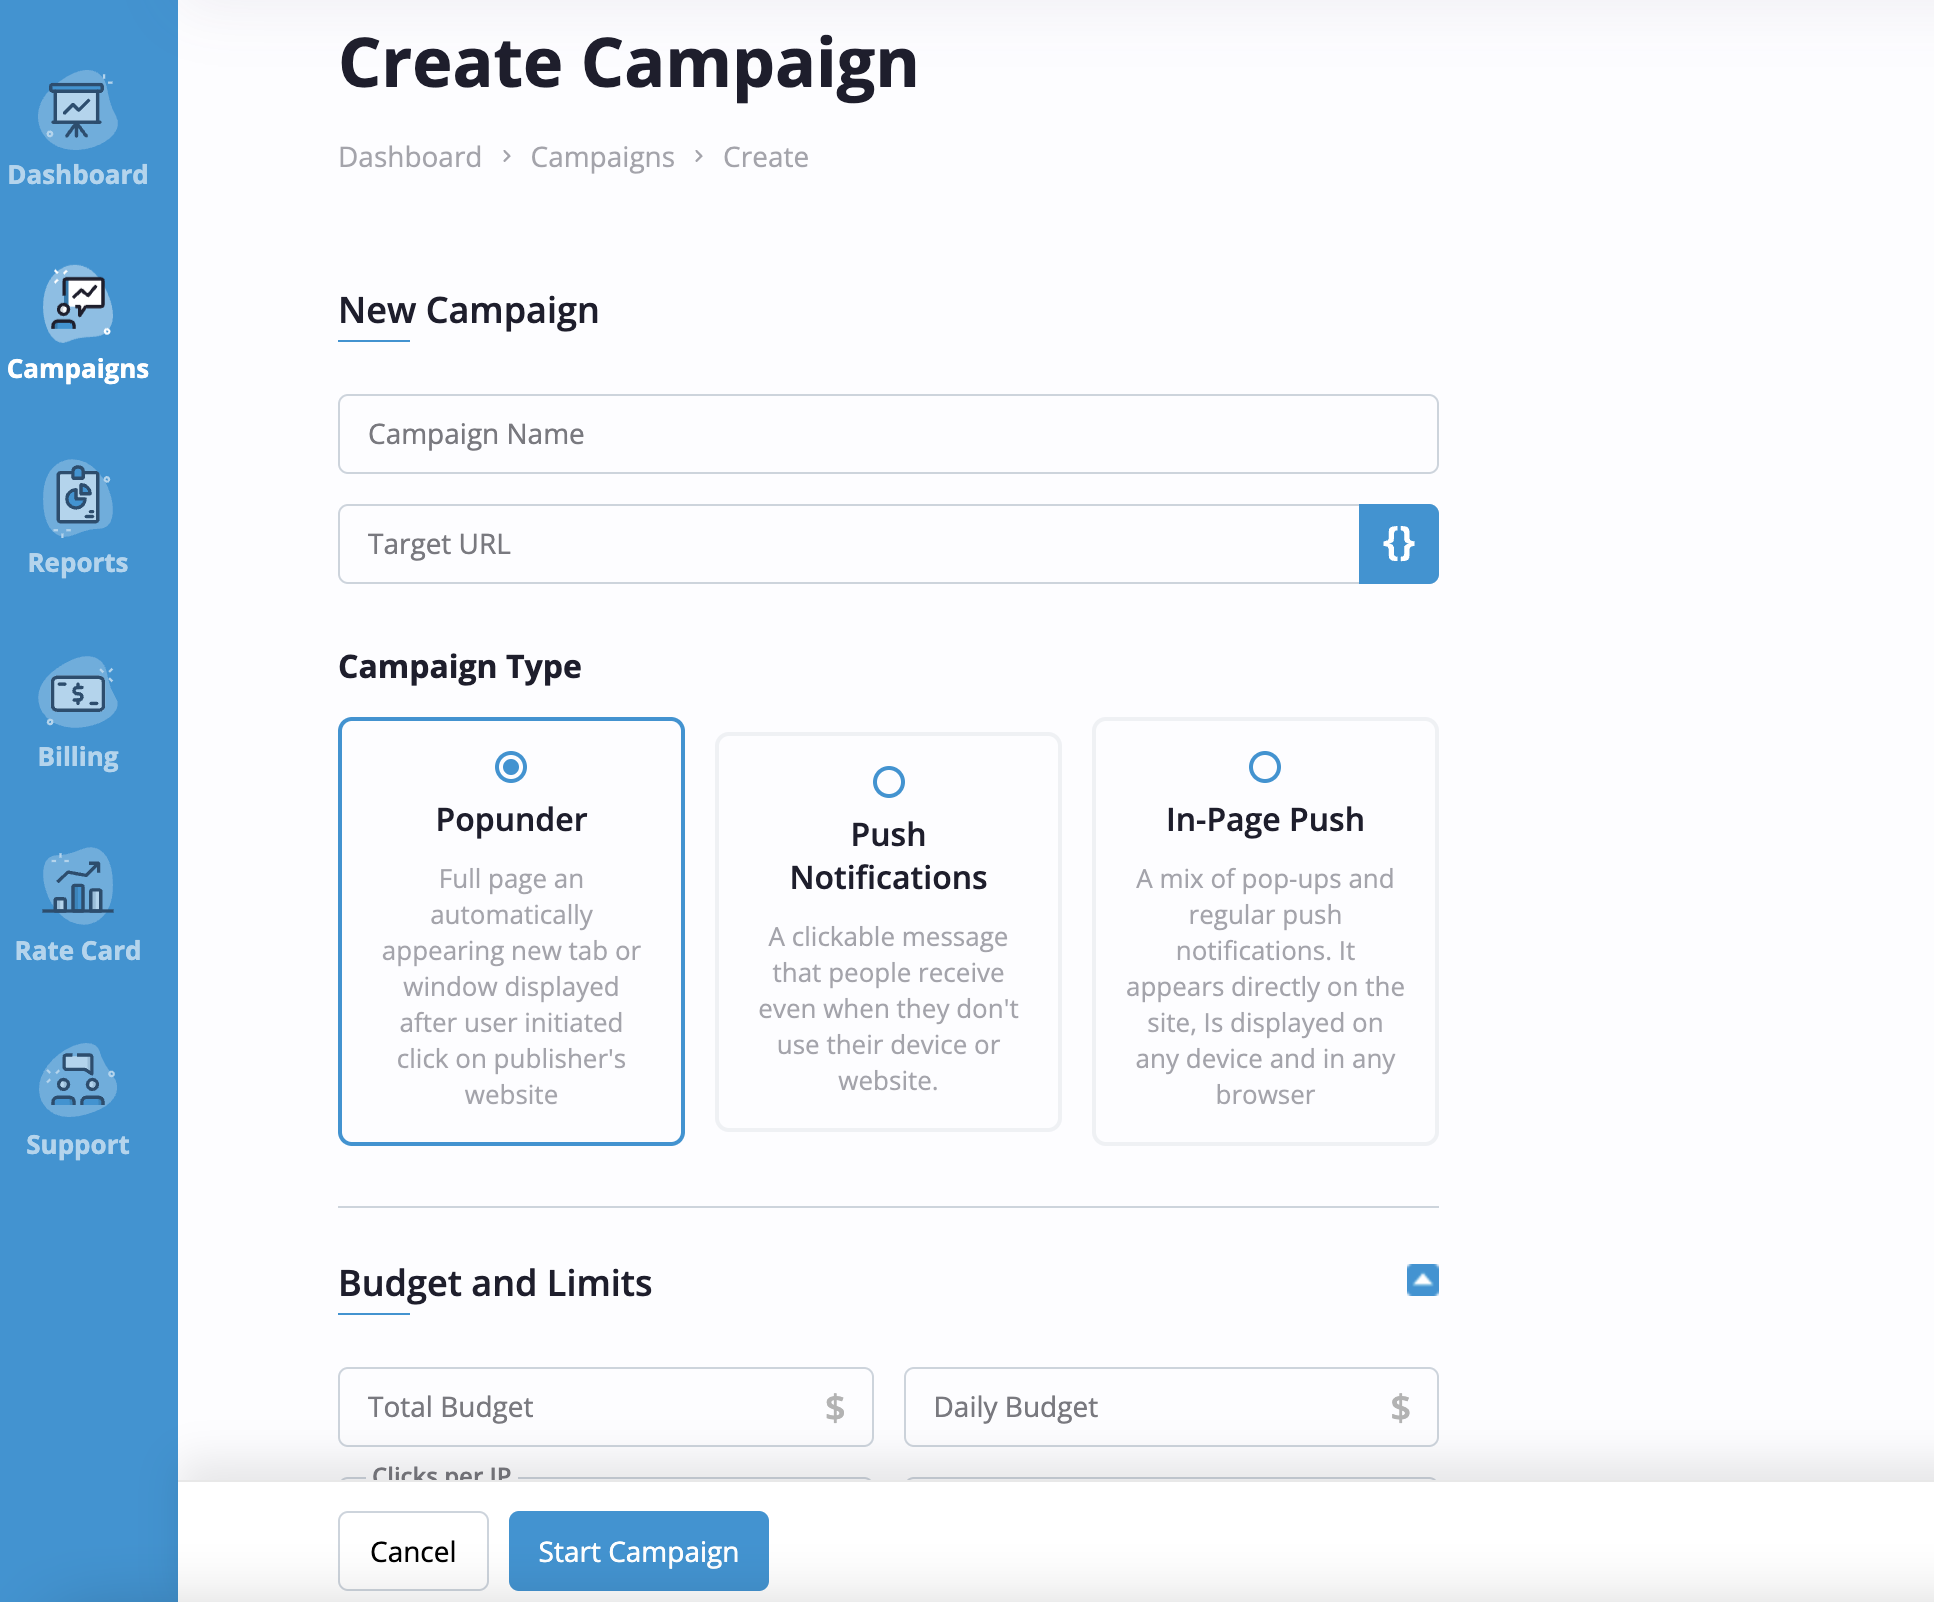
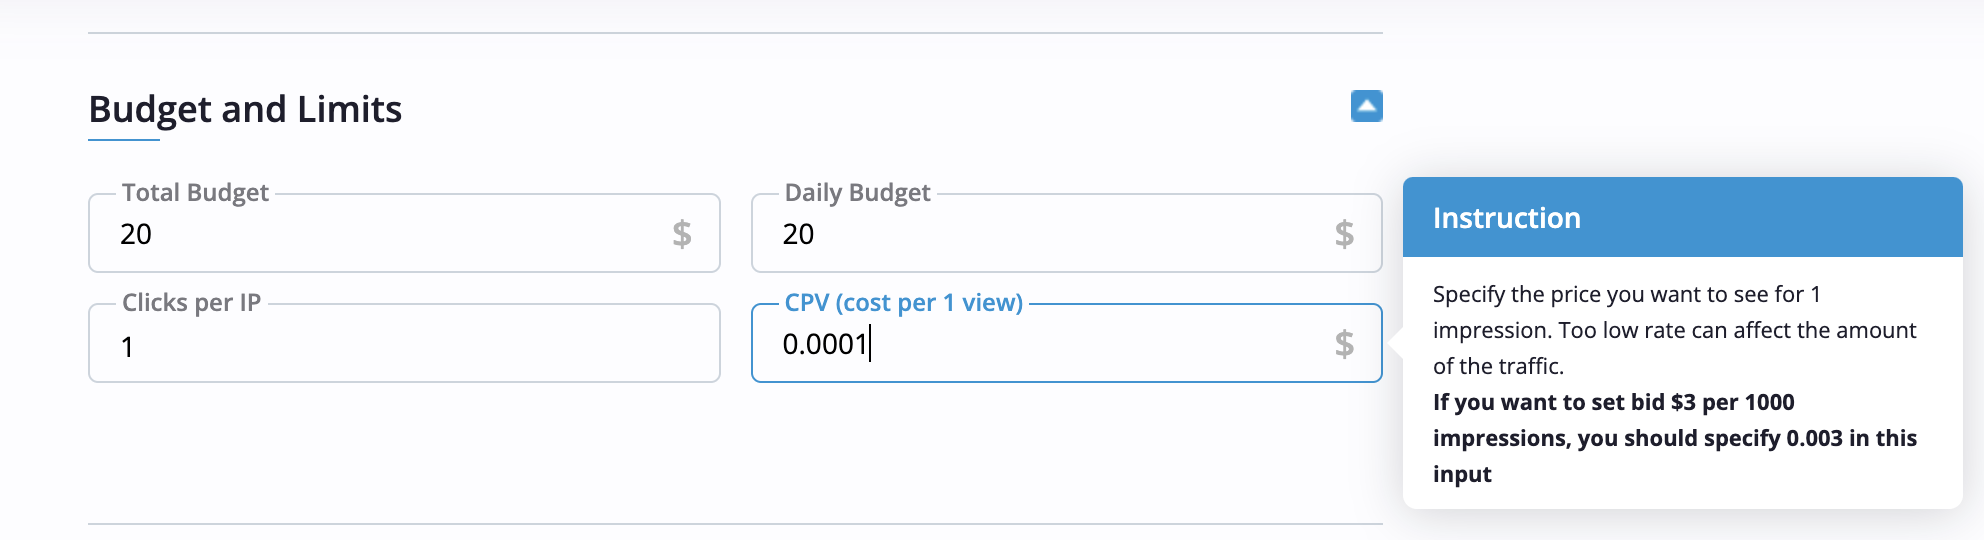
Add campaign budget in the proper way, be careful with CPV rate to avoid
overspend.
Minimum budget is $20
2. Targeting
Setup basic targeting for your ads. Add geo where you want to promote, operating system and browser
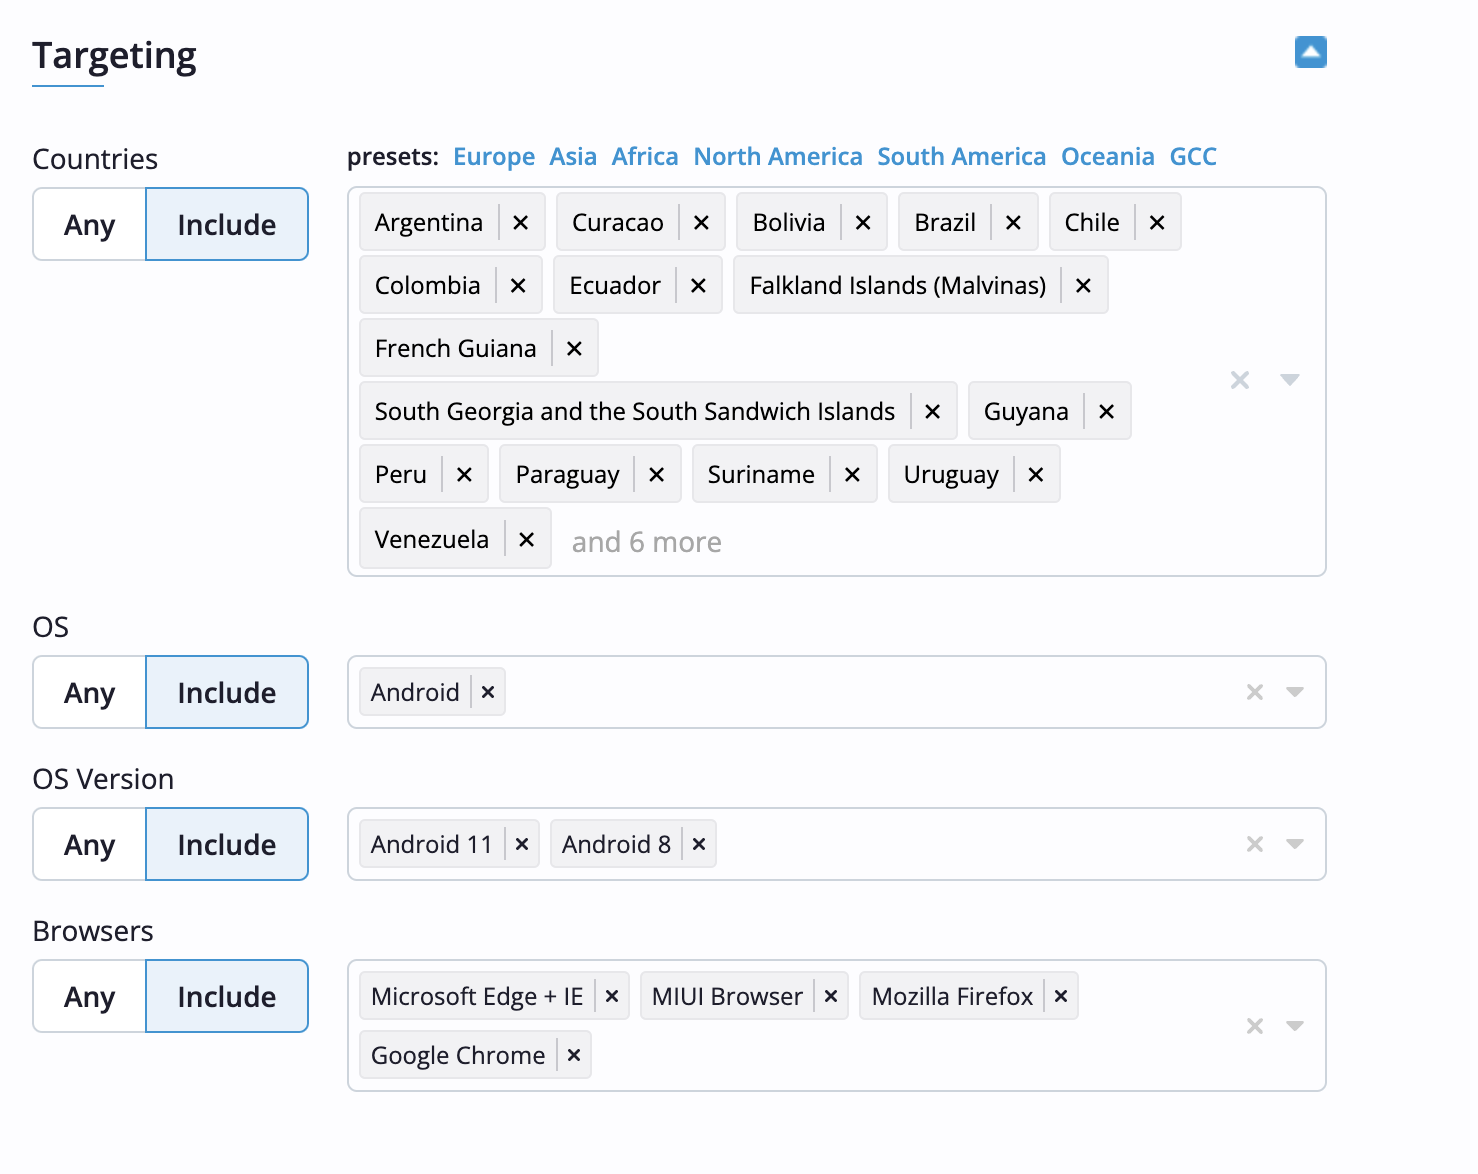
If necessary you may set up advanced targeting.
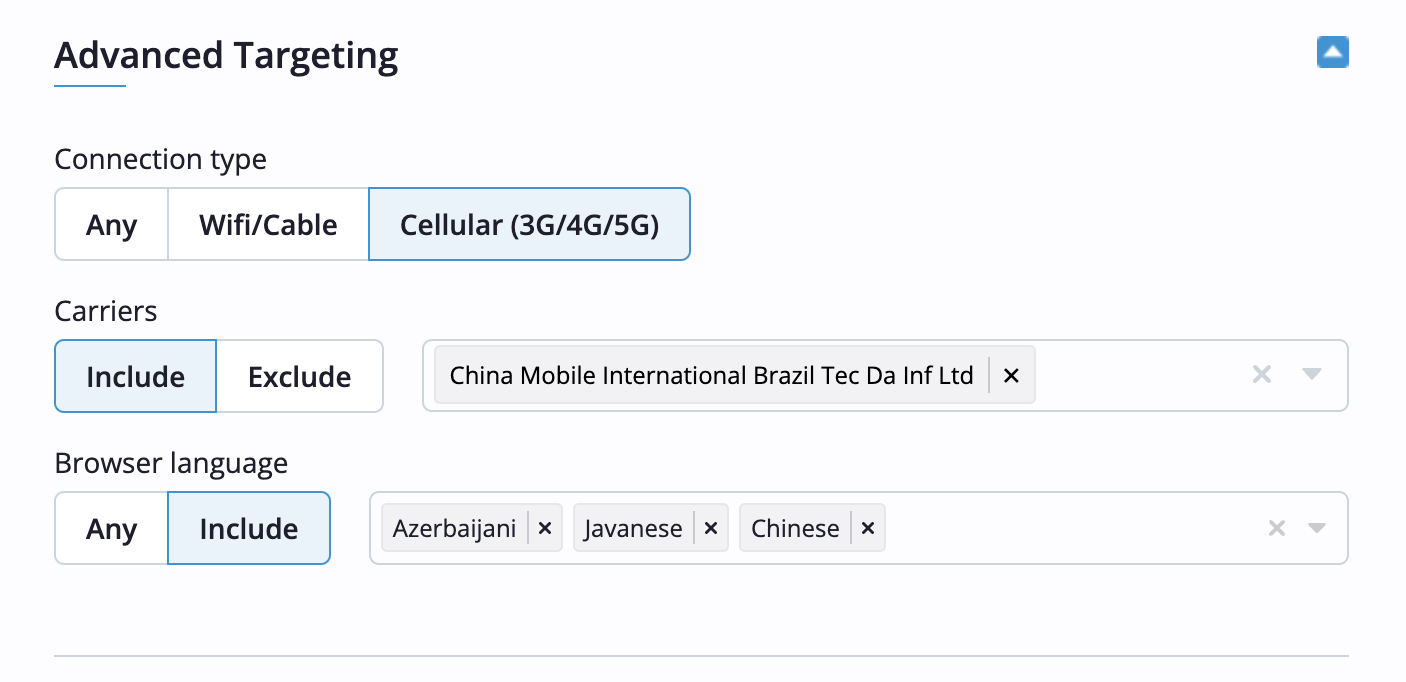
Choose connection type and browser language.
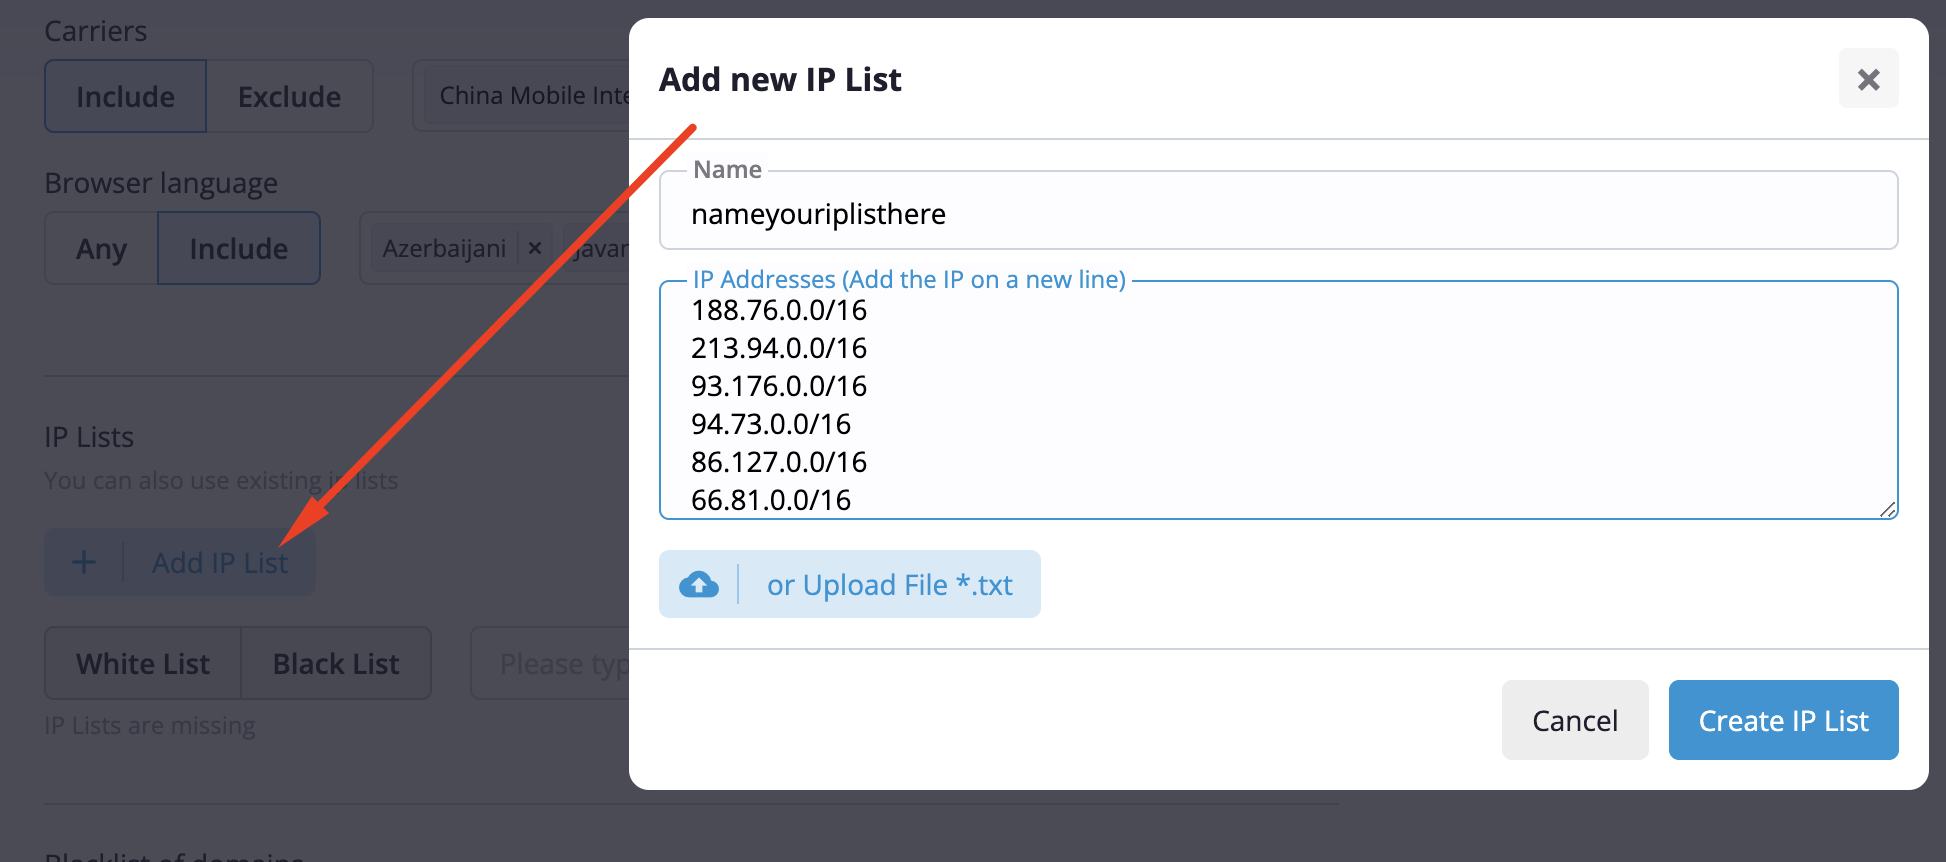
Create and attach IP list

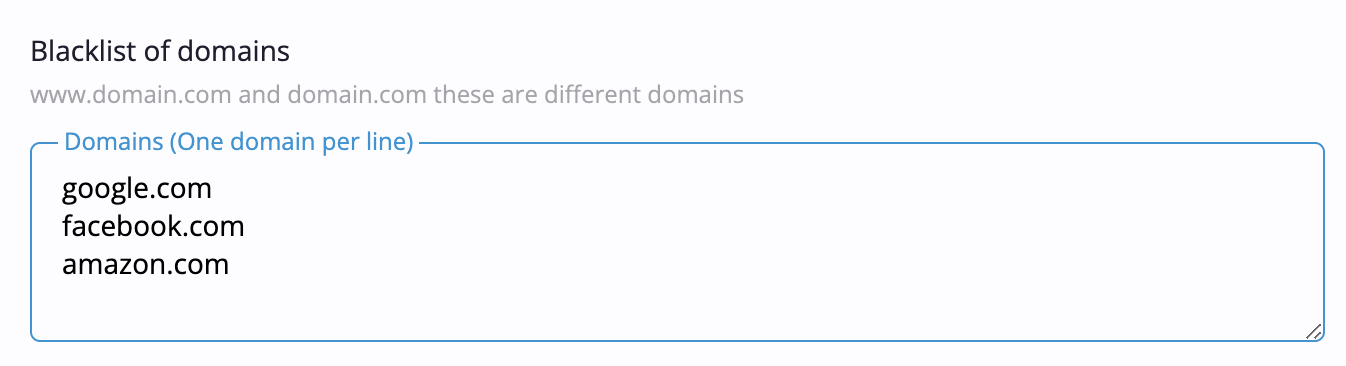
FIlter unwanted sources by domain
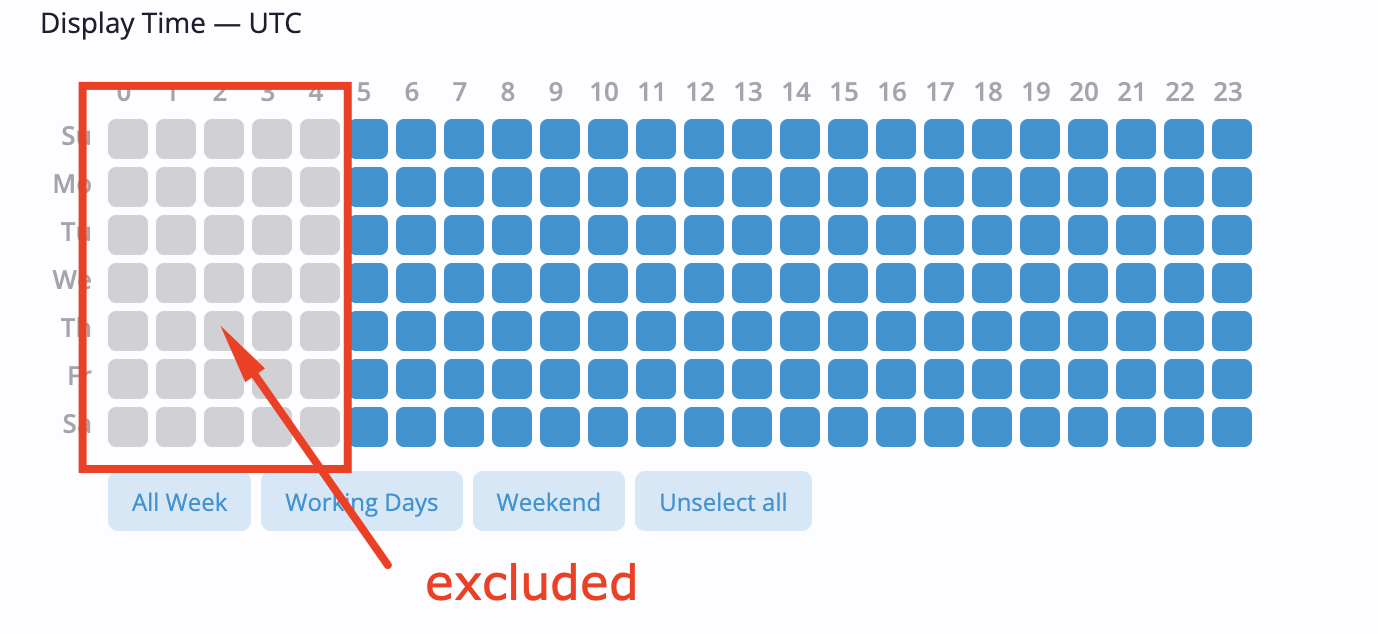
Setup display day and time.
Get s2s postback to setup conversion tracking (do not forget to change
{conversion} and
{payout} macros to your own internal tokens of
your own tracking system on your side).
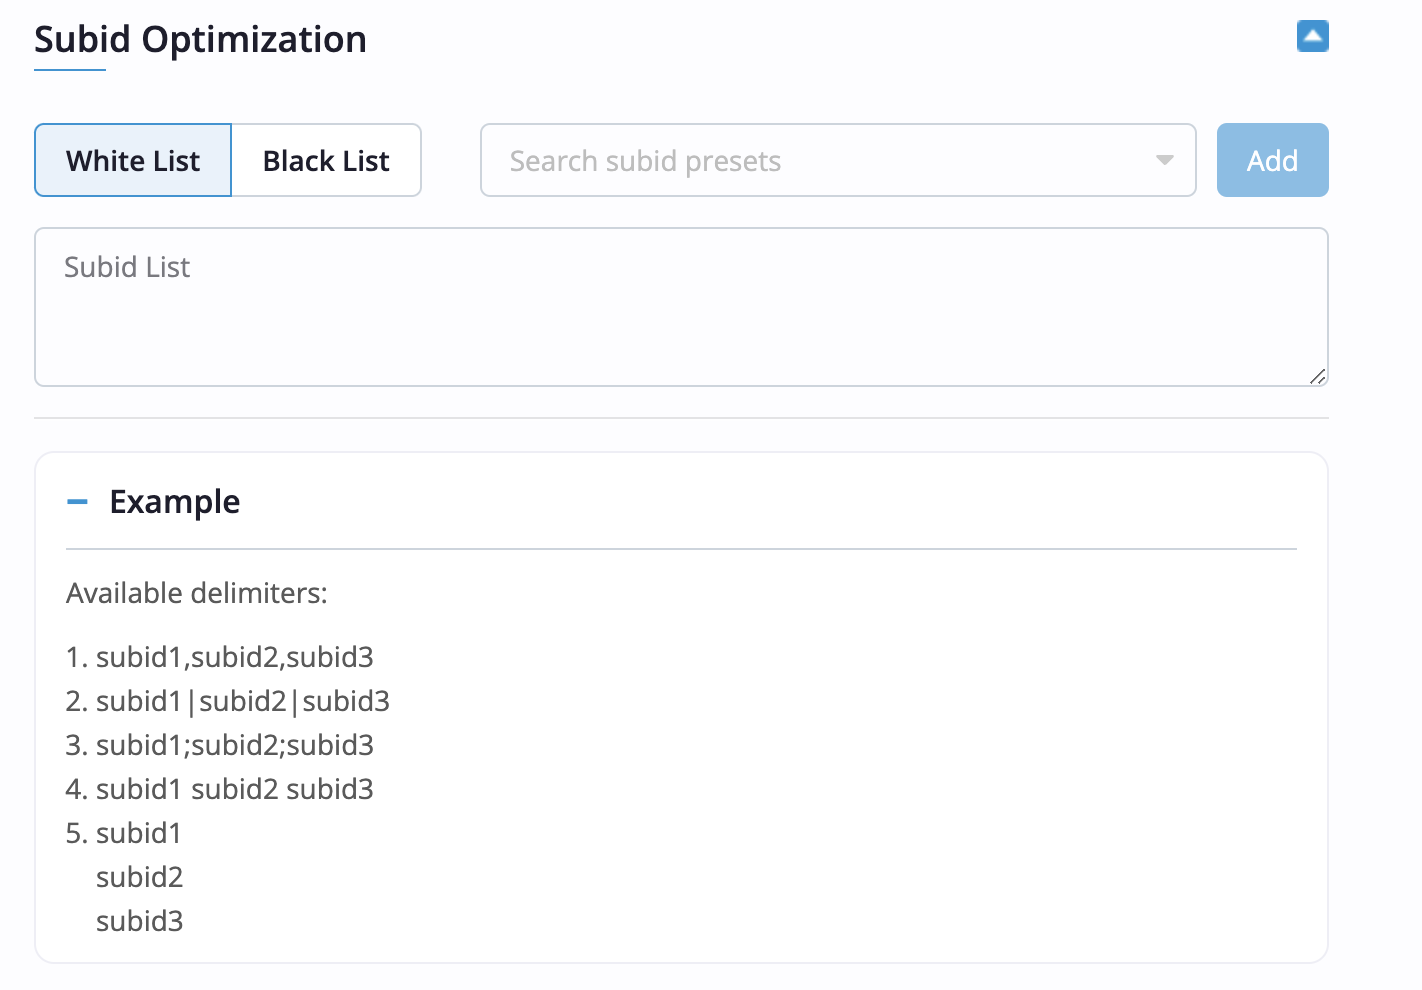
Blacklist or whitelist sources of traffic - you also can create and save
your own lists.
(find more how to increase performance of your ads
in Optimization Documentation)
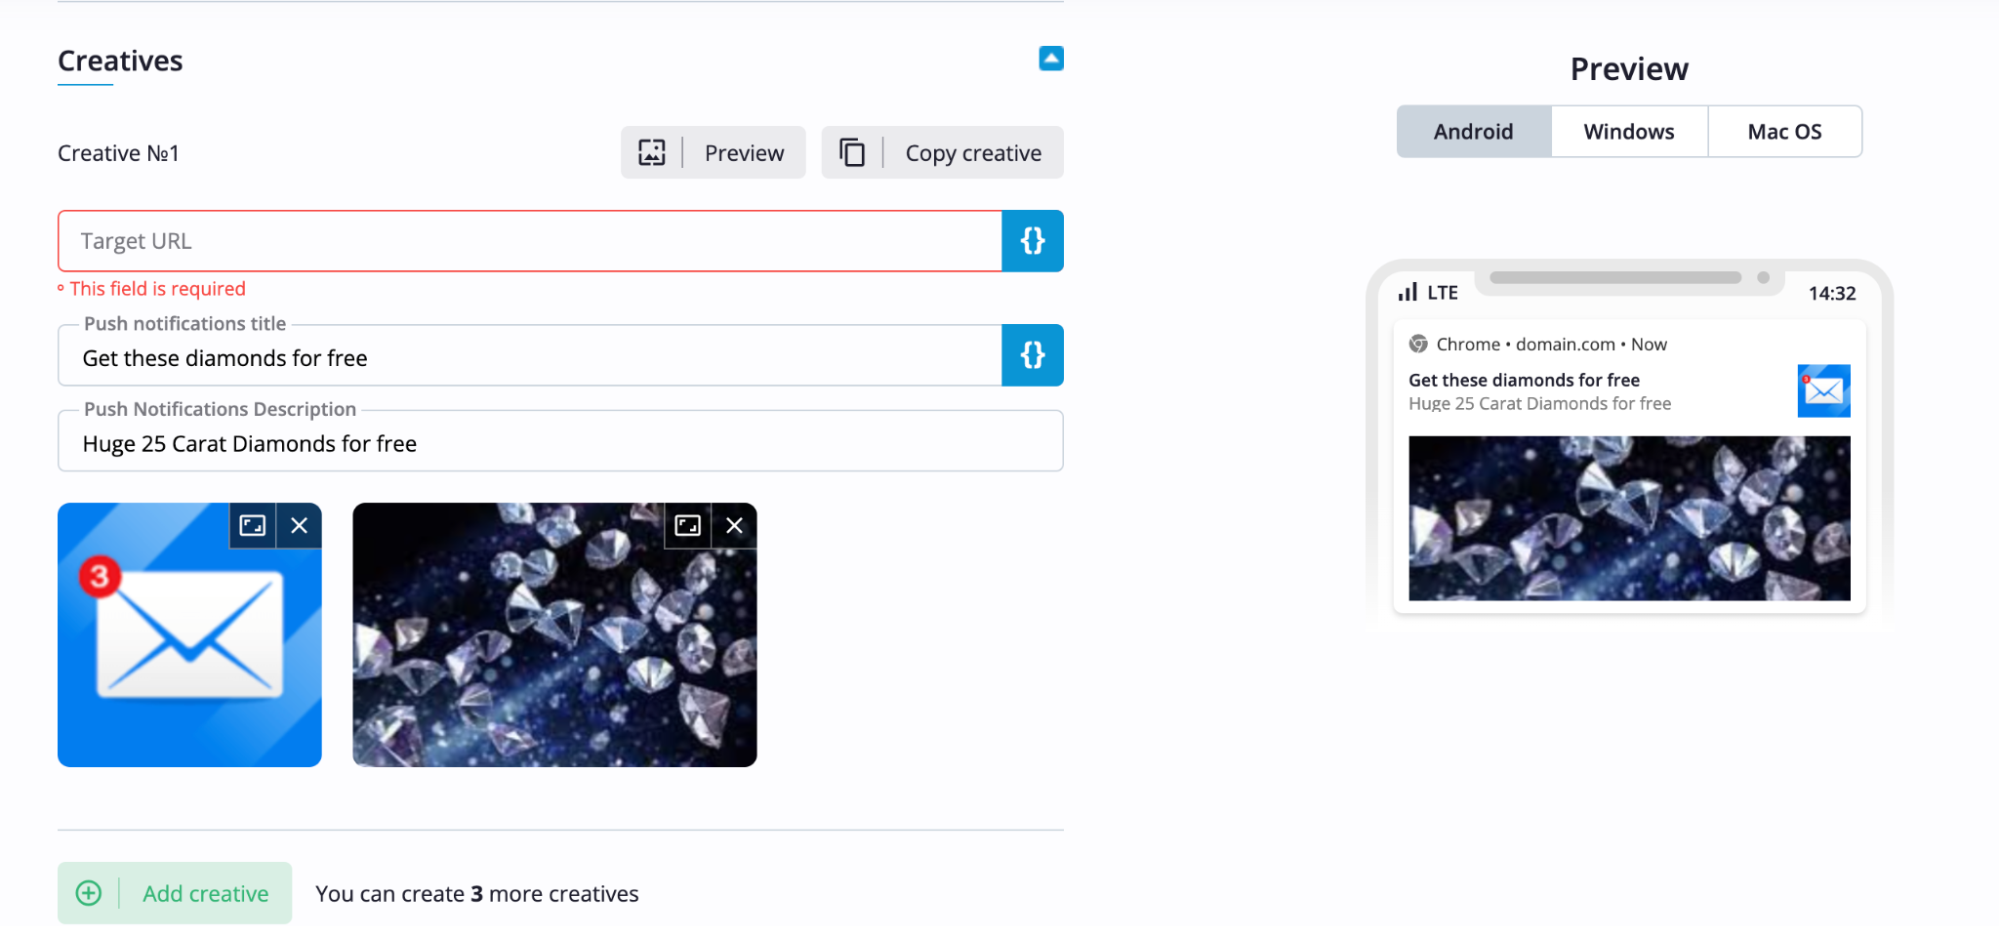
For Inpage and Web push formats you need to set up creatives (up to 4
per one ad campaign).
You can upload and edit images, add Title
and Description and use different urls for each campaign.
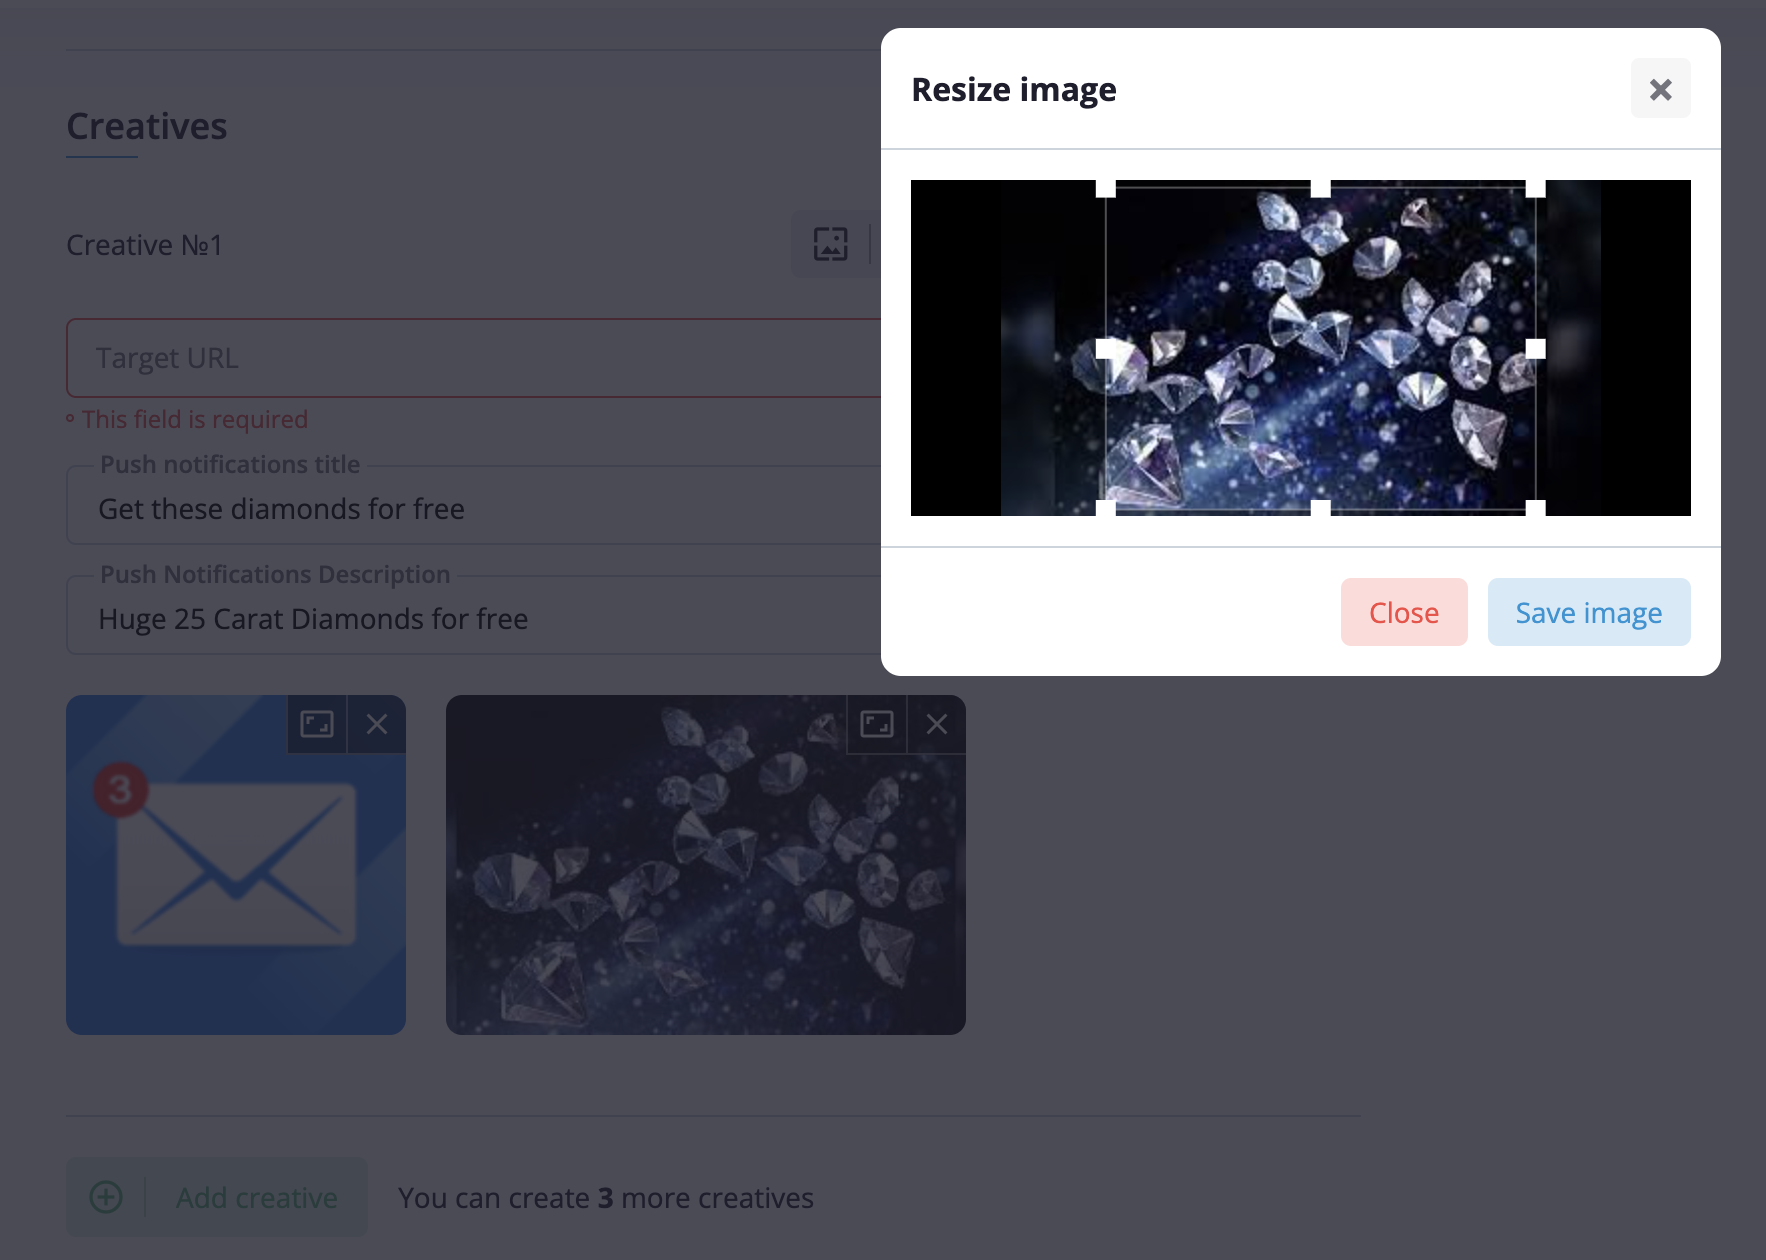
You also can preview your advertising and find a better look if necessary.